Gene Model View
Individual Gene Model View
Data
This view displays gene models, variants, DNA coverage, miRNA, CTCF, target regions, DNase, H3K27ac, and, if applicable, RNA coverage, fusions, and splicings.
Patient data appear on separate plots, as opposed to the group view.
Global filters affect this view. Any sample-based filters set here and/or variant filters set here determine what variants, coverage, fusions, and splicings appear in this view. If no global filters are set, all are shown.
Visuals
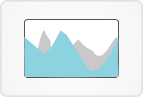
Genomic backbone data appear on the top plot, and individual patient plots are added below. Gene models appear on all plots.
In the patient list, color-coded lines to the left of a patient ID indicate that the patient has a variant at the current genomic position.
If a global sample group comparison is active, the patient IDs are color-coded by group.
If a patient has more than one sample, two or more circles will appear below the plot heading. One circle is solid black, and the other(s) are outlined. The solid circle will change every three seconds, along with the date, indicating which sample currently appears.
The rotation between samples every three seconds affects variants, DNA and RNA coverage, fusions, and splicings, so you may see each of these come and go, depending on which samples have them.
RNA-Seq appears in turquoise and DNA coverage in blue, as indicated by legends to the left. The range of counts will differ for each sample, and y-axis labels update accordingly.
When zoomed in, gray or orange squares appear at the bottom of patient plots, gray if the sample does not have a BAM file, orange if it does.
Tumor only variants appear below the gene models and are labeled with an "T."
Variants with an ExAC frequency > 0 are indicated with a *.
Splicings appear as turquoise arcs, and the width of an arc corresponds to depth.
Fusions appear as dotted magenta lines. They also appear as solid magenta lines on the small gray genome wheel at top left.
User interactions
All data types can be toggled on/off via the checkboxes in either the "Data" or "Genomic backbone" panels at the top of the page.
To stop the automatic rotation between samples every three seconds, click a circle under the plot heading for a patient. Clicking any of the circles will display the data for that sample.
Click and drag over a section of the x-axis on any plot to zoom into that section. The cursor will turn into a plus sign when you mouse over a draggable area.
If the viewing region is small enough, and a given sample has a BAM file, click one of the orange squares that appears at the very bottom of the plot to view the BAM file for that sample at that location.
Mousing over a gene model displays the gene name.
Mousing over a fusion line displays the left and right genes and their chromosomes.
Clicking on a variant symbol opens a dialog with more viewing options.
Patient plots can be added or removed at any time via the patient list at left.
You may switch to the group-based view by clicking the "Switch to group view" link under the patient list.
Group Gene Model View
Data
This view displays gene models, variants, DNA coverage, miRNA, CTCF, target regions, DNase, H3K27ac, and, if applicable, RNA coverage, fusions, splicings, and a heatmap of RNA-Seq expression.
All data are shown on one plot, as opposed to the individual view.
Global filters affect this view. Any sample-based filters set here and/or variant filters set here determine what variants, coverage, fusions, and splicings appear in this view. If no global filters are set, all are shown.
Visuals
Genomic backbone data and coverage appear in the top half of the location-based plot. In the bottom half, variants, fusions, and splicings appear with exons, introns, and UTRs.
Tumor only variants appear below the gene models and are labeled with an "T."
Variants with an ExAC frequency > 0 are indicated with a *.
The size of variant symbols corresponds to the number of currently selected samples containing that variant.
Splicings appear as turquoise arcs, and the width of an arc corresponds to depth.
Fusions appear as dotted magenta lines. They also appear as solid magenta lines on the small gray genome wheel at top left.
If applicable, an RNA-Seq expression heatmap will appear below the main plot, clustered by gene and sample.
Grouped data
When grouped, coverage data appear as lines rather than areas. RNA-Seq lines are solid and DNA coverage lines are dotted. They are color-coded according to global sample filter groups.
Fusions and splicings are also color-coded according to global sample filter groups.
Variants are split into upper and lower sections according to global sample filter groups. The sections are indicated by colored rectangles that span the width of the plot.
User interactions
All data types can be toggled on/off via the checkboxes in either the "Data" or "Genomic backbone" panels at the top of the page.
Click and drag over a section of the top half of the location-based plot to zoom into that section. The cursor will turn into a plus sign when you mouse over the draggable area.
Mousing over a gene model displays the gene name.
Mousing over a fusion line displays the left and right genes and their chromosomes.
Mousing over a splicing arc displays junction ID, position, depth, and flanking widths.
Mousing over a gene label in the RNA-Seq heatmap will highlight that gene in the plot above.
Mousing over a tumor only variant displays variant type, ref, alt, chromosome, start, end, count of tumor only samples with that variant, frequency across tumor only samples, and frequency in OHSU AML normals.
Clicking on a variant symbol opens a dialog with more viewing options.
Patient data can be added to or removed from the plot at any time via the selection box at the left. All patient IDs are contained in that selection box, and you can start typing to narrow the choices.
You may switch to the individual-based view by clicking the "Switch to individual view" link under the patient selection box, but note that you will be limited to the first five patients in your current set (the rest will be visually indicated so that you can add them if you choose).